
When Photoshop files become damaged or corrupted, file owners are often unable to access their content and valuable work. It’s frightening to encounter unexpected behavior or errors, but your Photoshop file can be recovered with the right recovery utility.
The experts at SecureData explain how to handle common file issues for Adobe Photoshop PSD files and offer potential solutions.
What to Do if Your PSD File is Not Working
Troubleshooting Your Damaged File
File corruption can occur due to many factors including sudden power outages, network issues, save errors, software failure, and more.
To begin, you can try to save the file to a different location. Do this by using the “Save as” function in Photoshop and reloading your content.
- Click File > Save as
- Rename the file and save it in a new location
Make sure to check that your intended file extension (.psd) matches the file type. It’s possible that the file extension chosen does not match the file type of your image. If that happens, you should get an error message signifying a file type error.
If you are experiencing problems opening the psd file and get a corresponding error message, you should try relaunching Photoshop. Exit and Close the program. Wait a minute or two and relaunch it. Try opening the file again. If you are still experiencing issues, you may need a file repair utility to help.
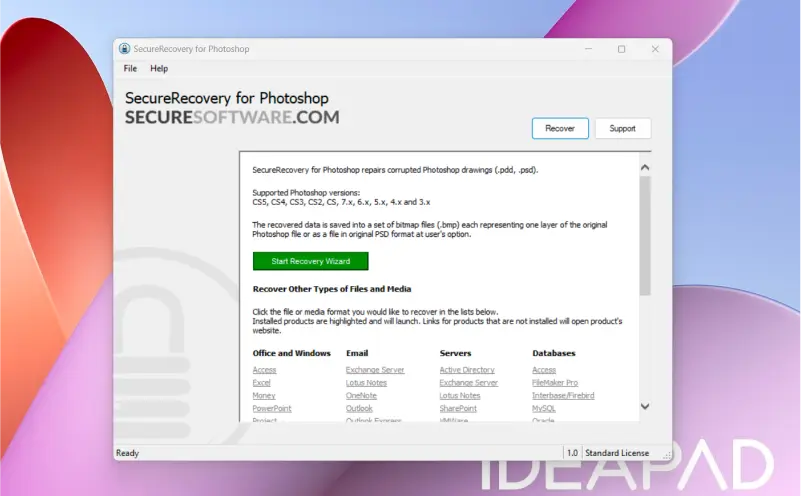
SecureRecovery for Photoshop
SecureRecovery for Photoshop is one the most efficient and safe utility programs for psd file recovery. This powerful utility is able to restore and repair corrupted Photoshop files in minutes, helping to get your images working again.
This software can repair corrupted PSD in the latest versions of Photoshop. Users can choose between the original format and separate layer files. They can also recover color palettes, layer properties and orders, color depths, image sizes, opacity choices, blending modes, and more.
Once your corrupted file has been restored, you can save each recovered layer as a separate bitmap. Alternatively, SecureRecovery for Photoshop will generate a new PSD file on your behalf.
Below, you will find a step-by-step guide for recovering your corrupted Photoshop files with SecureRecovery for Photoshop.
How to recover files using SecureRecovery for Photoshop
Step 1: Download and Install SecureRecovery for Photoshop
- Download SecureRecovery for Photoshop and launch the utility on your Microsoft Windows machine.
- Depending on your version of Windows, you may need to give permission for the launcher to make changes to your computer. Click Allow to ensure the recovery suite can install itself on your machine.
- Read and accept the Software License Agreement and click Install.
- Once finished the software can then be launched.
The demo version can be switched over to the full product once you have purchased a license key.
- Navigate to the “Help” tab and select “License Manager.”
- Type in your license key
Once the license key is accepted, all the features in the SecureRecovery for Photoshop suite will become available.
Step 2: Start the Recovery Wizard
- On the landing screen, click the green Start Recovery Wizard button.
Alternatively, you can recover different types of files. On this screen, you’ll see a list of document, email, server, and database file types. You can click on a file extension to automatically open the relevant software, including SecureRecovery for Word or Excel. If you haven’t installed these utilities yet, you will be taken to each separate software solution’s download page.
Step 3: Chose the PSD file for Recovery
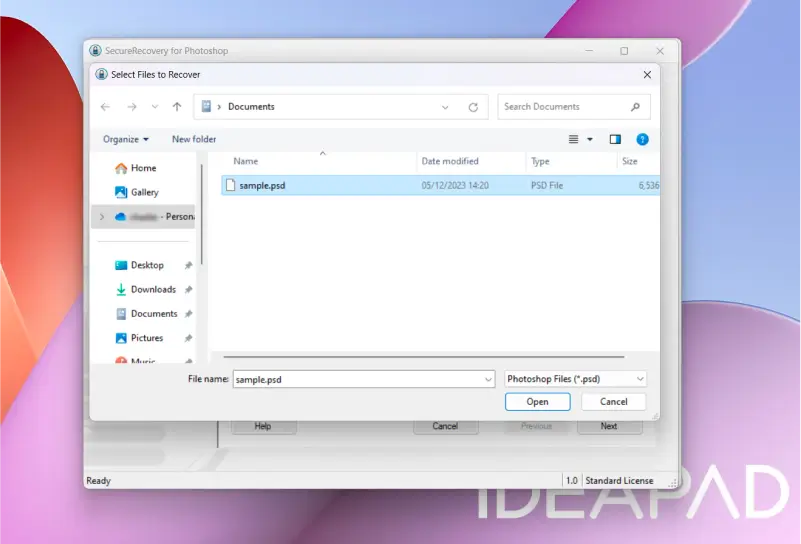
- You will now be asked to locate your PSD file. Navigate to your file, click it, and choose Open.
If you wish to, at this stage of the recovery process, you can select more than one file for repair. You can choose to add individual files or entire folders.
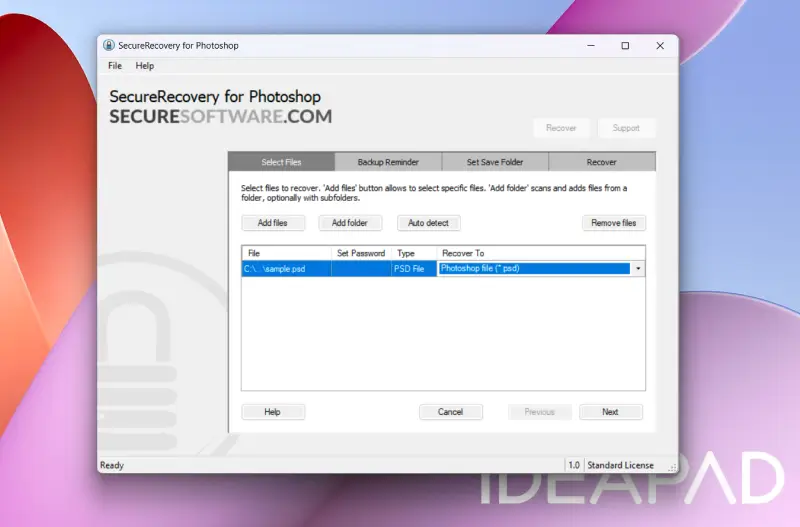
- Choose between two recovered file outputs.
- If you choose PSD, the new file will be generated as a single Photoshop file.
- Alternatively, you can select bitmap (BMP), which will generate each layer as a separate bitmap file.
- Optionally, Click Select Password to restrict access to your new PSD file
- Type in a password.
A feature to note on this page is Auto-detect. Selecting this option will instruct the software to automatically find files you may want to include in the file repair process.
- If you add a file by accident, select the file and click Remove files.
- When you are ready, click Next.
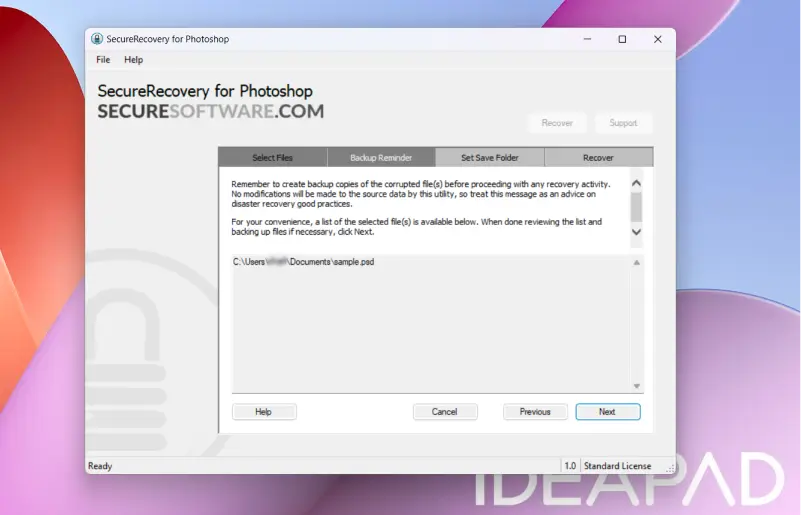
Next, you’ll see a reminder to create backups of the file(s) you want to recover.
- As a best practice, backup your files before you attempt to make any major changes or undergo a recovery process.
- Use the file location links provided to navigate to your files, copy them, and move them to a safe location.
- When you are ready to proceed, click Next.
Step 4: Choose a Save Location
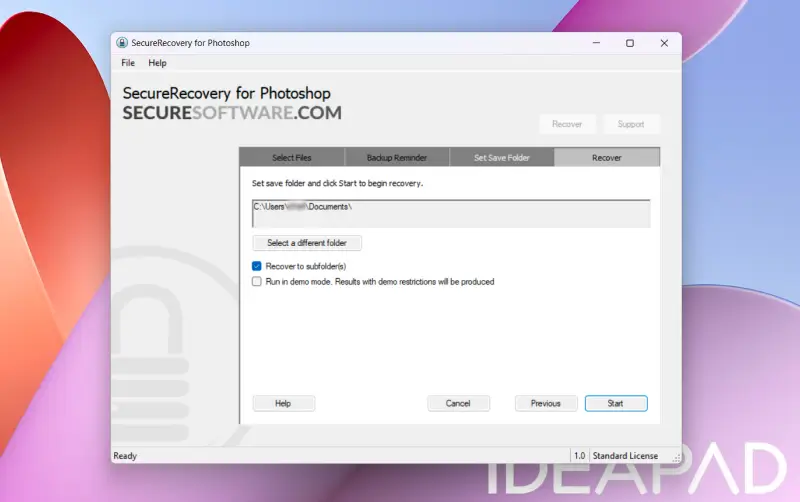
You will now be asked to choose a location for your new file to be saved. By default, as shown above, you will be offered a destination such as C:\Users\[Name]\Documents.
- Click Start to begin the recovery attempt.
Note: You have the option to run the software in demo mode. This option has restrictions on the final result.
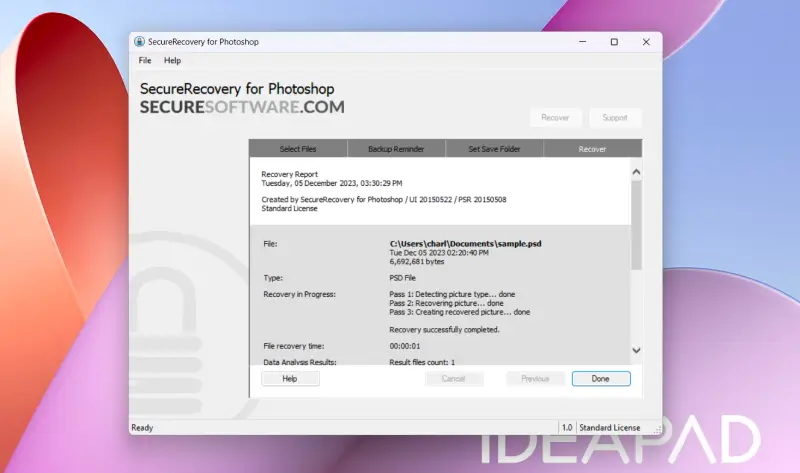
Once you click Start the PSD file recovery process will launch. Within a few seconds, the file repair will be complete. Once the task has finished, you will be shown a recovery report and an activity log link will be generated.
An example report is below:
Congratulations, the repair process of your Photoshop file is now complete. You should be able to open and edit the new PSD file. If you received the message, “Sorry, no data to recover detected,” contact an expert from SecureData to help recover your file.
Frequently Asked Questions
What is a corrupted Photoshop file?
Corruption occurs when a file is damaged in some way and rendered inoperable. There are many reasons why Photoshop files can become corrupt. These include power outages, malware, unexpected system crashes, or an incompatible plugin. You may also get an error during saving or renaming the file, or file relocation to a damaged drive.
What does a corrupted Photoshop file look like?
Typically, error messages will appear if you attempt to open a corrupted Photoshop file. This could include, “the document [filename.psd] could not be opened.”
Is backing up my PSD files important?
Backing up your data is always good practice, especially when irreplaceable content is involved. Regarding Photoshop files, corruption could mean you lose important Photoshop projects.
Backup files should be kept separately from your primary system to prevent data loss in cases of hardware failure or system crashes. We recommend you consider backing up PSD files on external hard drives or in the cloud.
However, if you have no backup available, a dedicated file recovery solution is the best option. SecureRecovery for Photoshop can repair your files and prevent data loss.


")


