
When SharePoint databases and files corrupt, this can lead to workplace disruption and loss of productivity.
While SharePoint database files and documents may corrupt or become inaccessible due to compatibility issues, power failures, and other factors, these problems can be resolved quickly with the right tools.
The experts at Secure Data Recovery, the authority in RAID, SSD, and hard drive recovery, explain how to handle common data loss scenarios for Microsoft SharePoint databases and offer potential solutions.
How to repair your corrupted SharePoint files
If files or documents are lost or corrupted due to database problems or malware, you can try to restore your files by rolling back to previous versions in SharePoint.
However, SecureRecovery for SharePoint Database is a utility able to retrieve and repair your corrupted files in moments, saving you the time and stress typically associated with SharePoint document recovery.
SecureRecovery for SharePoint Database
SecureRecovery for SharePoint Database is a powerful Microsoft Windows utility capable of retrieving documents and files from corrupted SharePoint databases.
SecureRecovery Document Recovery for SharePoint supports all versions of Microsoft SharePoint Server 2007 and can restore folders, libraries, forms, web structures, objects, and more – as well as recover user documents without effort.
All available user data files are retrieved during the process, and SecureRecovery Document Recovery for SharePoint will also provide detailed XML files with all recoverable information, making it easier for users to recreate damaged databases.
Corrupted SharePoint databases and lost information can cost businesses dearly. To complete safe, efficient, and reliable repairs, below is a step-by-step guide for recovering your corrupted files with SecureRecovery Document Recovery for SharePoint.
Step 1: Install and Launch the Software
- To begin your SharePoint document recovery journey, download SecureRecovery for SharePoint Database.
- Depending on your version of Windows, you may need to grant permission for the launcher to make changes to your computer. Allow this to ensure the recovery suite can install itself on your machine.
- Read and accept the Software License Agreement, click install, and the software can now be launched.
- If you have paid for the software, you can change the demo over to the full product. Navigate to the Help tab and select License Manager. Type in your license key and once accepted, all of the features in SecureRecovery Document Recovery for SharePoint will become available.
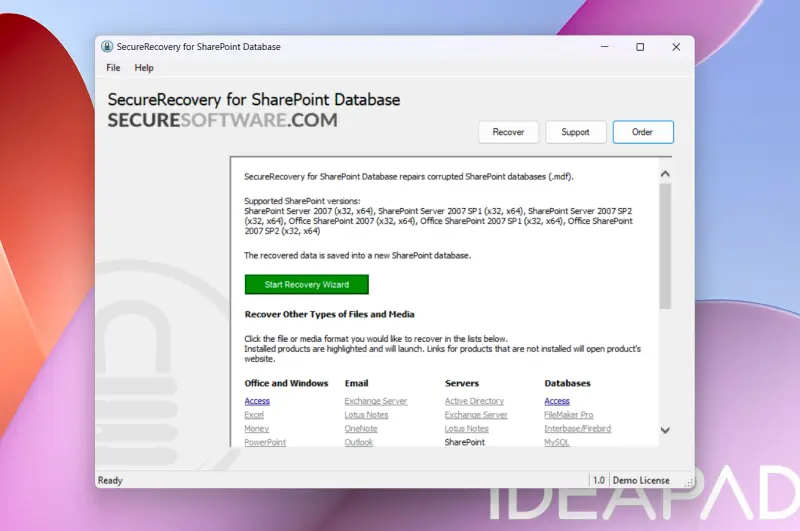
Step 2: Start the Recovery Wizard
- At the software’s landing screen, click the green Start Recovery Wizard button.
- Alternatively, if you want to recover another type of file, this page includes a list of file types available for recovery. You can click on these links to automatically open the relevant software, such as SecureRecovery for Word or Excel. If you haven’t installed the right utility yet, you will be taken to each separate software solution’s download page.
Step 3: Select Files To Recover
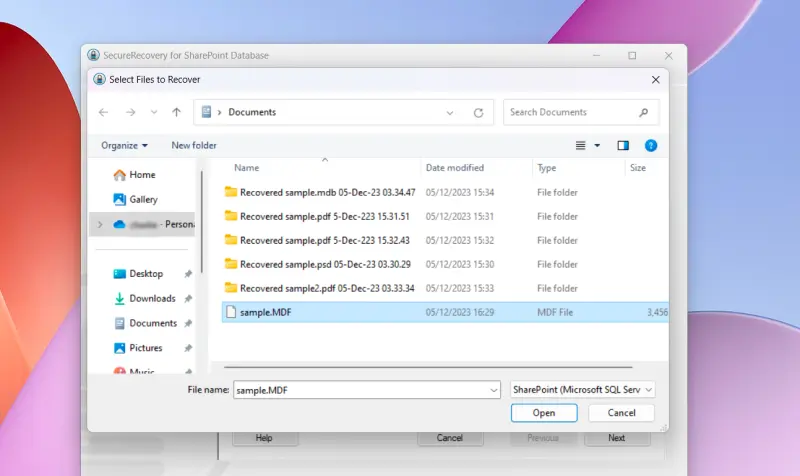
- You will now be asked to locate your SharePoint file. Navigate to your file, click it, and choose Open.
- At this stage, we recommend you create a backup copy of the damaged file before attempting a repair.
Step 4: Confirm File Selections

- If you want to repair only one database, you can go ahead and click Next.
- Alternatively, if you want to attempt to repair more than one, select Add files or Add folder.
- In the interest of security, if you want to set a password to restrict access to what will be your new database file, you can click just below Select Password and create a password for inclusion.
- A feature to note on this page is Auto detect. Selecting this option will command the software to automatically detect files you may want to include in the data recovery process.
- If you select a file by accident, select the file and click Remove files.
- When you are ready, click Next.
Step 5: Back Up SharePoint Files
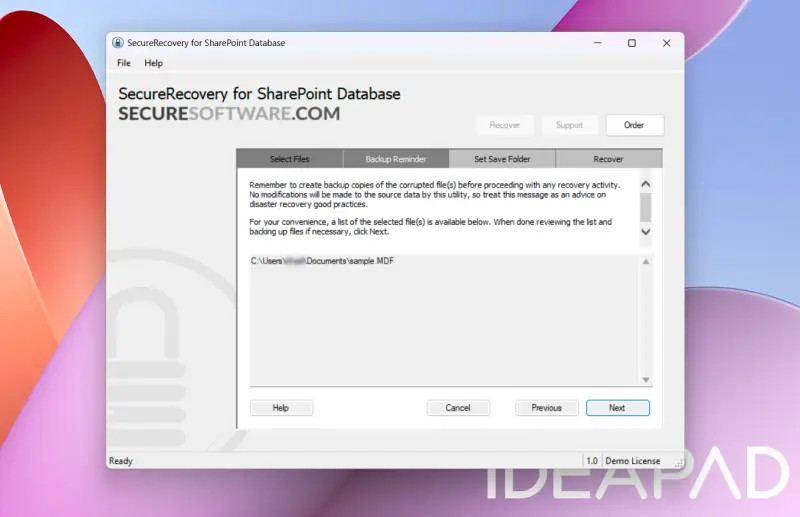
- It is crucial you ensure you have backup copies of the database files you will be attempting to restore and repair.
- If you have not created a backup, select and copy the file location address provided.
- When you are ready to proceed, click Next.
Step 6: Provide SharePoint Web Server Extension Files and Set Save Folder
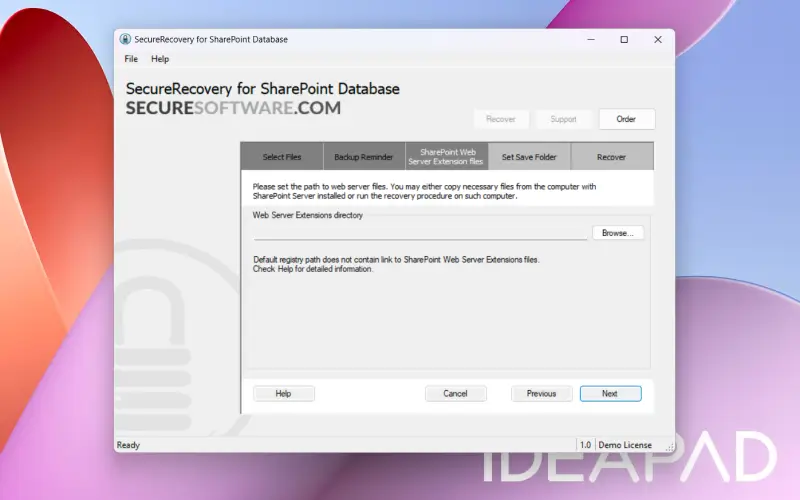
- You will now be asked to set the path to web server files, and on the following page, the location for your new file to be saved will be requested.
- By default, you will be offered a destination such as C:\Users\[Name]\Documents.
Step 7: Review the Recovery Report
- Click Start to launch the recovery process.
- You will only have to wait a few seconds for the recovery process to complete.
- Once the task has finished, you will be shown a recovery report and an activity log link will be generated. An example report is below:
Congratulations, you have now repaired and recovered your SharePoint file and have prevented severe data loss. If you need further assistance or receive the message, “Sorry, no data to recover detected,” contact an expert from SecureData.
Frequently Asked Questions
What is a corrupted SharePoint database?
SharePoint database corruption happens when changes to the code happen during saving and data storage processes. Unexpected changes lead to corruption and damage.
SharePoint databases can become corrupted due to system outages and power issues, changes made to the database when RAM or storage levels are low, code errors and fragmentation, migration problems, accidental deletion, hardware failures, and more.
What do corrupted SharePoint files look like?
If the integrity of a SharePoint database has been compromised, you may find that the database does not perform as it should, query functions do not work, and files and documents have gone missing.
Is backing up my SharePoint database and documents important?
SharePoint databases can be crucial within a business’s infrastructure, so when data loss and corruption occurs, this can be extremely disruptive – and may be disastrous if irreplaceable files are lost.
Therefore, backing up your database at frequent intervals is the recommended practice.
However, if you have no backup available, SecureRecovery Document Recovery for SharePoint is your best option to repair your corrupt SharePoint database and salvage the documents within it.


